Fertilizers & Soil
How to Make Compost at Home (Simple Beginner Method)
Composting doesn't have to be complicated. Here's a simple method for making compost at home, even in a small space, with materials you already have.

Composting doesn't have to be complicated. Here's a simple method for making compost at home, even in a small space, with materials you already have.
Compost is one of the best things you can add to a garden, and you can make it for free from materials you’re already throwing away. Kitchen scraps, yard waste, cardboard — all of it can become rich, dark compost that improves your soil, feeds your plants, and reduces what you send to the landfill.
Here’s how to get started without overcomplicating it.
What Is Compost?
Compost is decomposed organic matter — basically nature’s recycling system, sped up and directed. When you pile up food scraps and yard waste and let them break down, you get a dark, crumbly, nutrient-rich material that improves soil structure, adds microbial life, and releases nutrients slowly into the soil.
It’s often called “black gold” by gardeners, and that reputation is earned.
The Simple Ratio: Browns and Greens
Composting works best when you balance two types of materials:
Greens (nitrogen-rich):
- Fruit and vegetable scraps
- Coffee grounds and filters
- Fresh grass clippings
- Plant trimmings (not diseased)
- Eggshells (technically neutral but fine to add)
Browns (carbon-rich):
- Cardboard (torn up, no glossy coatings)
- Newspaper
- Dry leaves
- Straw
- Paper bags
The ideal ratio is roughly 3:1 browns to greens by volume. More browns = slower but odor-free. More greens = faster but can get smelly. If your pile smells bad, add more browns.
Choosing a Composting Method
Bin Composting (Most Common)
A simple bin — plastic tumbler, wooden box, or wire cylinder — keeps your pile contained, deters pests, and looks tidy. You add materials, turn occasionally, and wait. If you are working with a tighter patio or side-yard footprint, our guide to the best compost bins for small yards and patios helps you choose the right setup.
The basic process:
- Start with a 4-inch layer of browns (leaves, cardboard)
- Add a layer of greens (food scraps)
- Cover with another layer of browns
- Keep alternating
- Keep the pile moist (like a wrung-out sponge) but not soaking
- Turn it every week or two to speed things up
- Wait 2–6 months for finished compost
Tumbler Composting
A sealed tumbler that you spin makes turning easy and speeds up the process. It’s more expensive upfront but very convenient and pest-resistant. A good option if you have a small yard or want things tidier.
Trench Composting (Easiest of All)
Dig a hole or trench in your garden bed, bury food scraps directly, and cover with soil. No bin needed. Microbes and worms do the work underground. Takes longer than above-ground composting, but requires essentially zero management.
Worm Composting (Vermicomposting)
A bin with red wiggler worms that eat your kitchen scraps and produce castings — one of the most nutrient-dense soil amendments available. Great for apartments and small spaces since the bin can live indoors. Requires keeping worms alive (they need moisture and stable temperature), but it’s not as difficult as it sounds.
What NOT to Compost
Avoid these in a home compost pile:
- Meat, fish, and bones (attract pests, create odor)
- Dairy products (same issue)
- Oily or greasy foods
- Diseased plant material (pathogens can survive)
- Dog or cat waste (can contain harmful pathogens)
- Treated wood products
Cooked vegetables are technically compostable but better avoided in open piles (pest risk). Fine for sealed tumblers.
How to Know When It’s Ready
Finished compost is dark brown or black, crumbly, and smells earthy — like forest soil after rain. You shouldn’t be able to identify any of the original materials.
If it still looks like food scraps or smells unpleasant, it needs more time or more turning.
Using Your Compost
- Top-dress garden beds: Spread a 1–2 inch layer on top of soil and let it work in with rain and watering
- Mix into potting soil: Add compost to homemade potting mixes (25–30% by volume)
- Side-dress vegetables: Spread compost around the base of growing plants midseason
- Improve clay soil: Mix compost into heavy clay soil to improve drainage and aeration
Starting Small
You don’t need a big setup to start composting. A small countertop bin collects scraps, and even a basic pile in the corner of a yard or a single bin from a hardware store gets you started. The key is just starting — imperfect composting is vastly better than no composting.
Once you see your first batch of finished compost and watch your plants respond to it, you’ll understand why gardeners get excited about what is, technically, very fancy rot.
Why Is My Compost Pile Smelling Bad?
Two different smells mean two different problems, and they do not have the same fix.
A rotten-egg or sour smell is an anaerobic pile — too wet, too packed down, or both, so the bacteria doing the work have run out of air. Turn the whole mass to break up the sodden layers, then work two or three inches of shredded cardboard or dry leaves through it to take up the free water. If the bin sits in a low spot that collects runoff, move it or set it up on a pallet.
An ammonia smell is the opposite problem: more nitrogen than the pile can hold, gassing off — and that nitrogen was the fertility you were trying to keep. Bury the fresh material under a thick layer of browns, and cover each load of kitchen scraps as it goes in rather than once at the end of the week.
How to Compost Through Winter Without Freezing
Be honest about what winter composting is. In most of the country a home pile slows to a crawl and may freeze solid, and that is normal — nothing is lost, and it restarts on its own in spring. Below roughly 50°F microbial activity drops off sharply, and a half-full bin sheds heat far faster than it can make it.
Two things genuinely help, and neither is a gadget. The first is bulk: a pile of about a cubic yard — three feet in every direction — holds its own warmth in a way a thin layer in a big bin never will. The second is insulation on the outside: straw bales banked against the sides, bags of dry leaves, or rigid foam panels, with the whole setup placed where a south-facing wall or fence puts sun on it. Collect scraps in a lidded container indoors and add them in one larger batch instead of opening the bin daily. Then leave it alone until the ground thaws, because every turn in freezing weather vents what little heat the core has.
What Actually Speeds Up Decomposition
Two things move the needle more than anything else, and both are free.
Cut everything smaller before it goes in. Pieces under about an inch break down several times faster than whole stems and flat sheets of cardboard, because decomposition happens on surfaces and chopping is how you make more of them.
Then get the moisture even all the way through, not just at the top. The middle of a pile is usually drier than it looks, and dry material simply stalls. Pre-soak cardboard, paper bags and egg cartons in a bucket for fifteen minutes before they go in so they are not the dry spot in the middle.
Hot composting is a different method, not a setting you turn up. Holding a pile in the 130–160°F range that breaks down tough, fibrous material means building the whole thing at once at roughly a cubic yard, mixing browns and greens rather than layering them, and turning on a schedule to bring the outside in. A bin you fill gradually is a cold pile no matter how often you turn it — it works at ambient temperature over months, which is a perfectly good way to make compost. It is worth knowing the difference for one reason: only a properly run hot pile gets hot enough for long enough to kill weed seeds. Keep seed heads and the roots of running weeds out of a cold pile, because they will come back out the other end alive.
How to Keep Rodents and Insects Out
Rodents come for food, and the reliable answer is a physical barrier rather than a deterrent. On a stationary bin, a floor and sides of quarter-inch hardware cloth is what rats and mice cannot get through — and it does not shut the worms out, which pass through that mesh freely. Bury fruit and vegetable scraps under six inches of leaves or torn paper as you add them, so there is no scent at the surface to find in the first place.
Insects are a different question, because most of them belong there. Pill bugs, springtails, beetle larvae and mites are the pile doing its job, and killing them slows the whole thing down. That is the argument against scattering diatomaceous earth in or around a compost bin: it works by abrading any soft-bodied arthropod that crosses it and cannot tell a pest from a decomposer, and it stops working as soon as it gets damp anyway. Spread coffee grounds through the browns instead of tipping them in as a layer, which mats together and goes anaerobic. If fruit flies get going, cap the fresh additions with an inch of dried grass clippings or finished compost — they breed on exposed food, so covering it ends the cycle within a few days.
Composting Gear
FCMP Outdoor Tumbling Composter (37 gal) ~$90Dual-chamber tumbling design. Easy to turn, keeps pests out, and produces compost fast.
Check Price on Amazon →Affiliate link — we may earn a small commission at no cost to you.
Bamboozle Countertop Compost Bin ~$25Charcoal-filtered lid keeps smells contained. Collects kitchen scraps before they go outside.
Check Price on Amazon →Affiliate link — we may earn a small commission at no cost to you.
Keep reading
Related guides
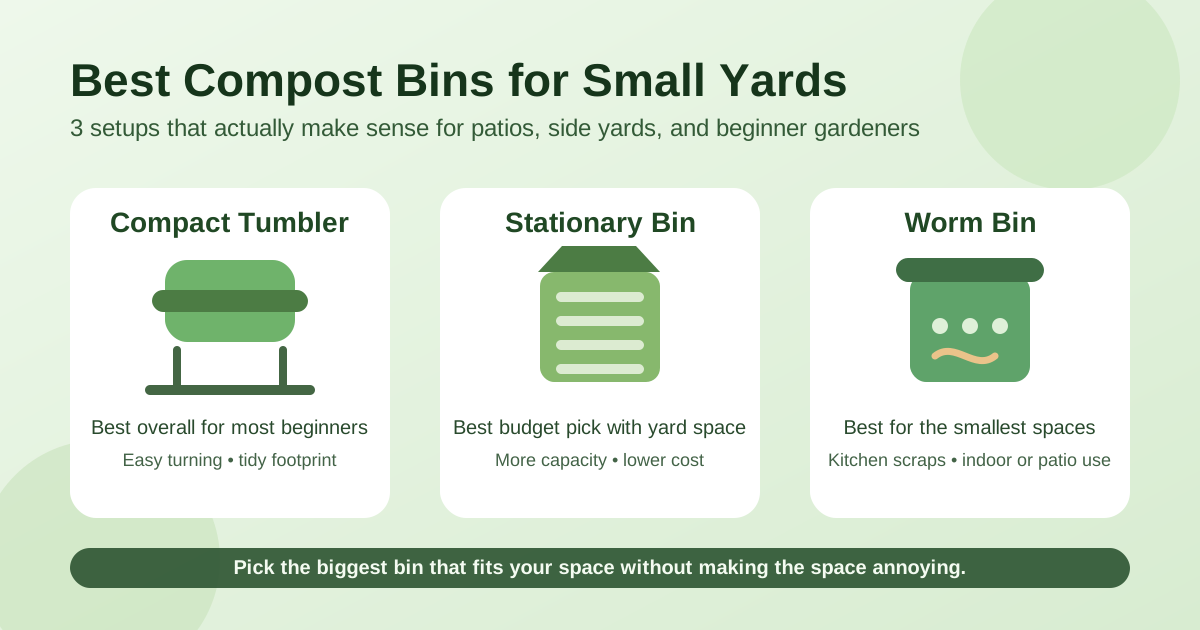
Best Compost Bins for Small Yards and Patios
The best compost bins for small yards and patios make kitchen scraps and yard waste manageable without smells, pests, or a giant footprint.
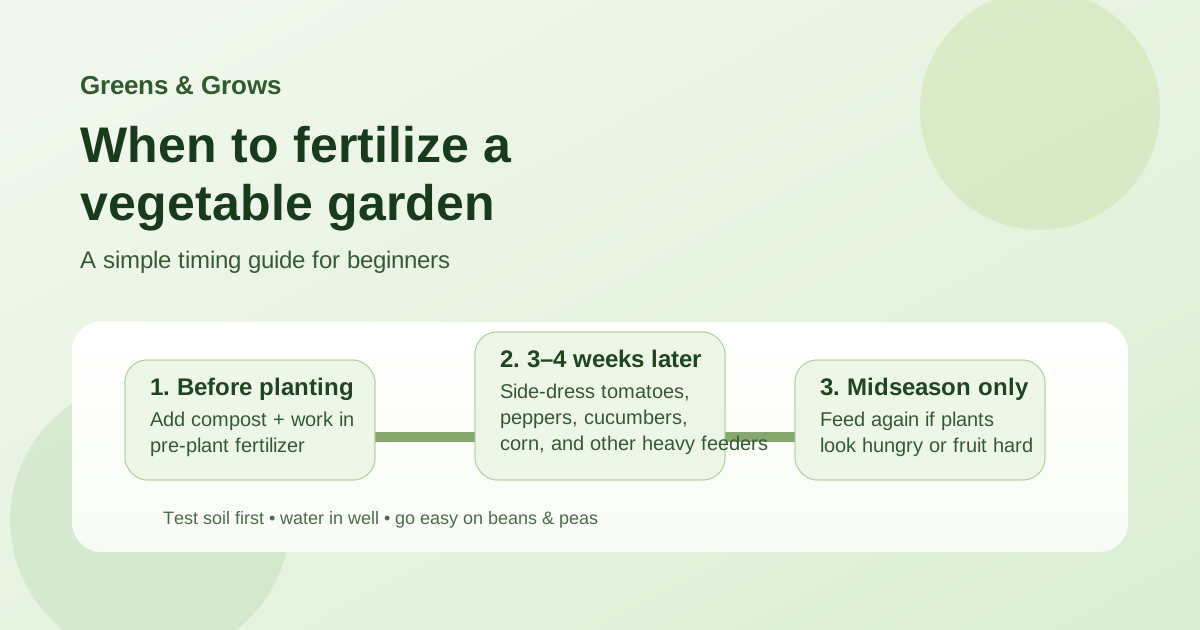
When to Fertilize a Vegetable Garden: Spring Timing Guide
Learn when to fertilize a vegetable garden in spring, after planting, and midseason so you feed vegetables at the right time without overdoing it.
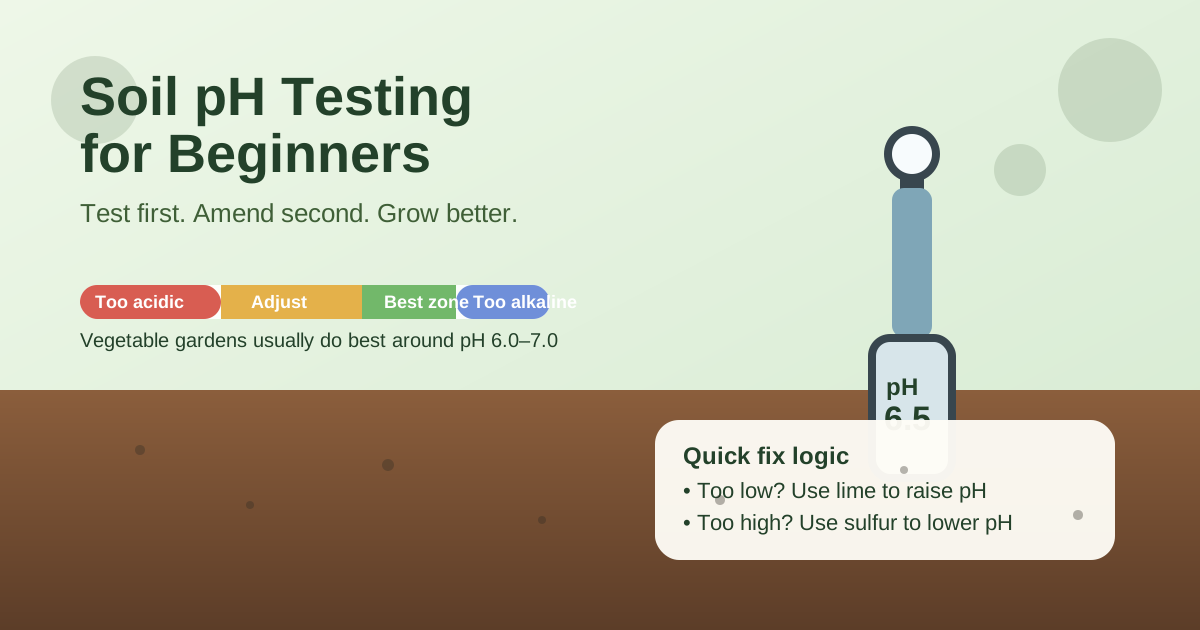
Soil pH Testing for Beginners: Get Garden Soil Right
Learn soil pH testing for beginners, including when to test, ideal vegetable-garden pH, and how to raise or lower pH without guessing.