Vegetable Garden
Raised Bed Gardening for Beginners: Setup, Soil, and What to Plant
Raised beds are one of the best ways to start a vegetable garden. Here's everything you need to set one up and fill it with vegetables that actually grow.

Raised beds are one of the best ways to start a vegetable garden. Here's everything you need to set one up and fill it with vegetables that actually grow.
Raised beds are how a lot of people get serious about growing food - and for good reason. They give you control over your soil, they drain well, they warm up faster in spring, and they keep weeds more manageable than in-ground beds. If you’ve thought about starting a vegetable garden, a raised bed is one of the best ways to begin.
Here’s how to set one up from scratch.
Why Raised Beds Work So Well
You control the soil. In-ground gardening means working with whatever soil you have - often clay-heavy, rocky, or poor. With raised beds, you fill them with exactly what plants need.
Better drainage. Raised beds don’t get waterlogged the way in-ground plots can. Roots breathe easier.
Fewer weeds. You’re starting with clean, weed-free soil. Some weed seeds will blow in over time, but it’s far less overwhelming than fighting established weeds.
They warm up faster. Raised bed soil warms earlier in spring than ground soil, which means an earlier planting start.
Accessible. Taller raised beds (12-18 inches) are much easier on your back - less bending, more pleasant gardening.
Choosing and Building Your Raised Bed
Size: 4 feet wide is the sweet spot - you can reach the center from either side without stepping in the bed. Length can be whatever fits your space: 4×4, 4×8, or longer. Height: 6-12 inches is standard; 12-18 inches for deeper root crops or accessibility.
Materials: Untreated cedar or redwood is the classic choice - naturally rot-resistant, looks good, lasts 10-20 years. Avoid pressure-treated lumber in vegetable beds (older formulations contained arsenic). Pine is cheaper but rots faster. Galvanized metal beds are increasingly popular, durable, and modern-looking.
For a convenient ready-to-assemble option, Gardener’s Supply offers well-designed raised bed kits in a variety of materials and sizes.
Location: 6-8 hours of direct sun is ideal for most vegetables. South or west-facing spots in your yard are best. Avoid areas near large trees (root competition and shade). Close to a water source is a big plus.
Assembly: Most DIY beds are just boards screwed together at the corners. For a 4×8 bed, you need four 2×6 or 2×10 boards and corner brackets or 4×4 posts. Level the ground first; no need to remove grass - it’ll die under the bed.
What Soil to Fill a Raised Bed With
This is where beginners often go wrong. Don’t fill a raised bed with garden soil or topsoil alone - it’s too heavy and compacts.
The classic mix that actually works: Mel’s Mix or similar:
- 1/3 compost (blended from multiple sources if possible)
- 1/3 peat moss or coco coir
- 1/3 coarse vermiculite or perlite
This gives you a light, fluffy, nutrient-rich, well-draining soil that plants love. It’s more expensive upfront than buying bags of topsoil but makes a huge difference in results.
Alternatively, look for bagged “raised bed mix” or “garden soil for raised beds” at your local garden center - these are better formulated than standard potting soil for outdoor use.
For a 4×8 bed that’s 12 inches deep, you’ll need about 32 cubic feet of soil mix.
What to Plant in a Raised Bed
Raised beds work well for almost any vegetable. Here are reliable choices for beginners:
Easiest:
- Lettuce and salad greens (grow fast, can be cut repeatedly)
- Radishes (ready in 3-4 weeks - great for impatient beginners)
- Green beans (plant seeds directly, very productive)
- Zucchini (almost aggressively productive - one or two plants is enough)
- Herbs: basil, parsley, chives
A little more involved but very rewarding:
- Tomatoes (need staking and consistent water)
- Cucumbers (need a trellis)
- Peppers (need heat and patience)
- Kale and chard (very hardy, can survive light frosts)
Companion planting tip: Avoid planting the same family of plants in the same spot each year - rotate crops to prevent soil-borne disease buildup.
Watering a Raised Bed
Raised beds dry out faster than in-ground beds because they’re elevated and have excellent drainage. In summer, you may need to water daily - stick your finger in the soil to check. A drip irrigation system or soaker hose makes this much easier and more efficient.
Mulch the surface with straw, wood chips, or leaves to retain moisture and reduce how often you need to water.
Feeding Your Raised Bed
Replenish compost at the start of each season - add a 1-2 inch layer on top and work it in lightly. During the growing season, supplement with a balanced liquid fertilizer every few weeks for heavy feeders like tomatoes and cucumbers.
Tools You’ll Actually Use
You don’t need much: a hand trowel, a garden fork or cultivator for mixing in amendments, and a watering can or hose. For a bigger setup, Amazon’s gardening tool section has reliable sets at various price points.
How to Line the Bottom of a Raised Bed
If your site has thick turf, lay overlapping sheets of plain, uncoated cardboard directly on the ground before filling. Skip glossy, waxed or heavily inked stock, and pull the packing tape and shipping labels off first — those are the parts that do not break down. Use three to four overlapping layers where grass is dense, with no gaps at the seams; a two-inch gap is where the grass comes back. Wet the cardboard thoroughly before adding soil, or the first watering floats it up into the root zone. It rots away over three to six months, by which time the smothered grass is gone and roots and worms move through freely.
Landscape fabric is the wrong material for the same job: it does not decompose, roots mat into it, and after a few seasons you are digging a plastic sheet out of the middle of your bed. Hardware cloth is a different tool with a different purpose — half-inch mesh stapled under the frame stops burrowing gophers and voles, and worms and roots pass through it without trouble, so add it only if you actually have that pressure. Moles are not a reason to; they eat grubs and earthworms, not vegetables.
Beds sitting on concrete or pavers need a different answer, and the common one is wrong. A layer of gravel under the soil does not drain the bed — water does not cross from fine soil into coarse stone until the soil above it is saturated, so a gravel layer raises the wet zone instead of lowering it. What works on a hard surface is depth and an exit: fill at least 12 inches, 18 if you want tomatoes or carrots in it, and make sure water can leave at the bottom edge — raise the frame slightly on feet or shims, or leave a gap in the bottom board. Expect the lowest inch to stay damp regardless, and put the shallow-rooted crops there.
Managing Soil Settling and Seasonal Top-ups
A fresh fill compacts over its first growing season, usually dropping 2 to 4 inches. That is normal, not a fault in the mix, and it is why you fill to just under the rim rather than heaping it flush — a mounded bed sheds water off the sides before it soaks in.
Top up with the same light mix you filled with, or with a 50/50 blend of that mix and cured compost. Do not top up with bagged topsoil: it is heavier than what is underneath it, and a dense cap over a light mix is the one layering mistake that actually restricts drainage and root growth. Make sure any compost is fully finished — if it still smells sharp or feels warm, it is not, and fresh manure or unfinished compost put straight against roots will burn them.
Check the level at the start of each season rather than continuously. Early spring, before anything is planted, is the easy time to add several inches at once; after pulling root crops is the other. What you are protecting is root-zone volume — a bed that has settled to 8 inches of usable depth will grow lettuce fine and will give you forked, stunted carrots.
Proper Spacing and Planting Depths
Crowding is the most common beginner mistake in a raised bed, because the soil is good enough that everything comes up. Airflow is what keeps foliage dry and disease down, so thin ruthlessly. Seed packets carry the spacing for your specific variety; as general raised-bed numbers:
- Leaf lettuce and spinach: 6 inches apart
- Carrots: thin to 2-3 inches; beets to 3-4 inches
- Bush beans: 4-6 inches apart, in rows 12-18 inches apart
- Bush cucumbers and squash: 12-18 inches per plant
- Tomatoes: 18-24 inches, more if you are caging rather than staking
- Vining crops on a trellis: about 12 inches between plants
Planting depth follows one rule: two to three times the width of the seed. Beans and squash go about an inch down, radishes and beets about half an inch, and tiny seed like lettuce and carrot barely gets covered — a quarter inch at most, pressed into the surface and misted, and kept damp until it germinates, because a fine seed that dries out once is dead.
Transplants are the exception. Tomatoes root along any buried stem, so plant them deep — up to the first set of true leaves, stripping the leaves below that line — and you get a much larger root system. Peppers do not do this; set them at the depth they grew in the pot, because a buried pepper stem tends to rot rather than root.
Thin to final spacing within about two weeks of emergence, and cut the extras off at soil level with scissors instead of pulling them, so you do not tear the roots of the seedlings you are keeping. For radishes and lettuce, sow a short row every two weeks rather than the whole packet at once — otherwise the entire planting is ready in the same week and most of it bolts before you eat it.
Extending the Season with Covers
Floating row cover — spun-bonded polypropylene, sold by weight — buys roughly two to three weeks at each end of the season. The light weights transmit around 85% of the light and hold about 2°F over the open air; heavier frost-grade fabric holds nearer 4°F, enough to carry greens through a 28°F night, and transmits noticeably less light. Use the light one for the long shoulder weeks and the heavy one only for the cold nights, rather than leaving a heavy cover on all spring and wondering why growth stalled.
The heat it keeps is heat radiating out of your soil, so the edges matter more than the fabric does. Anchor them all the way around with soil, sandbags or boards; an unsealed edge vents the entire bed, and loose fabric shifts in wind and abrades the leaves it lies on. Hoops of bent PVC or 9-gauge wire 18 to 24 inches above the soil keep the cover off the foliage — anywhere the fabric rests directly on a leaf, that leaf gets the outside temperature.
Vent it on warm days. Under sun, a sealed cover runs far above the outside air, and above roughly 70°F cool-season crops stop growing and bolt; lift one edge or pull the cover back entirely and replace it before evening. Doubling two layers is not worth it as a cold strategy — the second layer adds little and costs light — and on anything that needs insects to set fruit, squash and cucumbers especially, the cover has to come off once flowering starts or you get flowers and no fruit. Clear plastic bottles with the base cut off make usable cloches for a few slow-starting plants, but they overheat faster than anything else here: take the cap off during the day, and take them off entirely once nights stay above freezing.
Related Reads
- Best Vegetables to Grow for Beginners — what to actually plant in your new raised bed for a reliable first harvest
- NPK Fertilizer Explained — understand the numbers on your fertilizer bag so you feed your raised bed correctly
- Starting Seeds Indoors: A Complete Guide — get a head start on your growing season before your raised bed is even ready
Recommended Gear
Here are the products we recommend for getting started with raised bed gardening:
Best Choice Products 4x4 ft Raised Garden Bed ~$50Solid cedar construction, good drainage, easy assembly. Great starter size.
Check Price on Amazon →Affiliate link - we may earn a small commission at no cost to you.
FoxFarm Ocean Forest Potting Soil (1.5 cu ft) ~$20Rich organic mix - ideal for filling raised beds. One of the best bagged soils.
Check Price on Amazon →Affiliate link - we may earn a small commission at no cost to you.
Garden Tool Set (Stainless Steel, 9-Piece) ~$30Trowel, fork, pruners, and more. Everything you need to start.
Check Price on Amazon →Affiliate link - we may earn a small commission at no cost to you.
Keep reading
Related guides
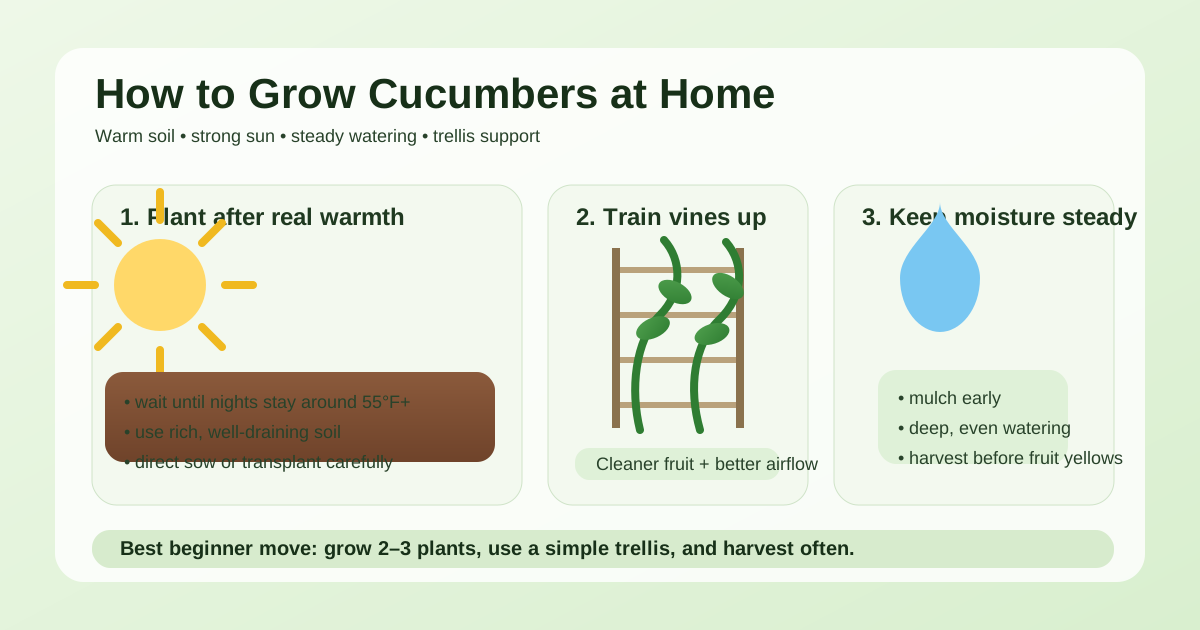
How to Grow Cucumbers at Home: A Beginner-Friendly Guide
Learn how to grow cucumbers at home with practical beginner tips on timing, soil, trellising, watering, feeding, pests, and harvests.
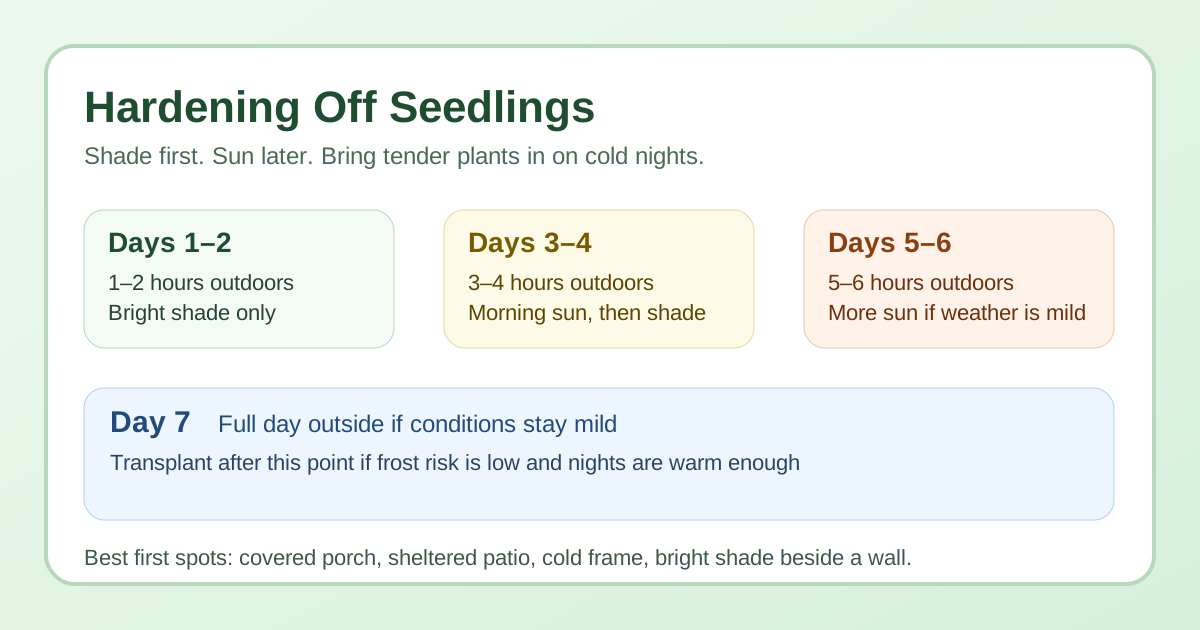
How to Harden Off Seedlings Without Killing Them
Learn how to harden off seedlings the right way so tomatoes, peppers, herbs, and flowers can move outdoors without transplant shock.
How to Grow Peppers at Home: A Beginner-Friendly Guide
Learn how to grow peppers at home from seed to harvest, including timing, soil, watering, feeding, and container tips for beginners.